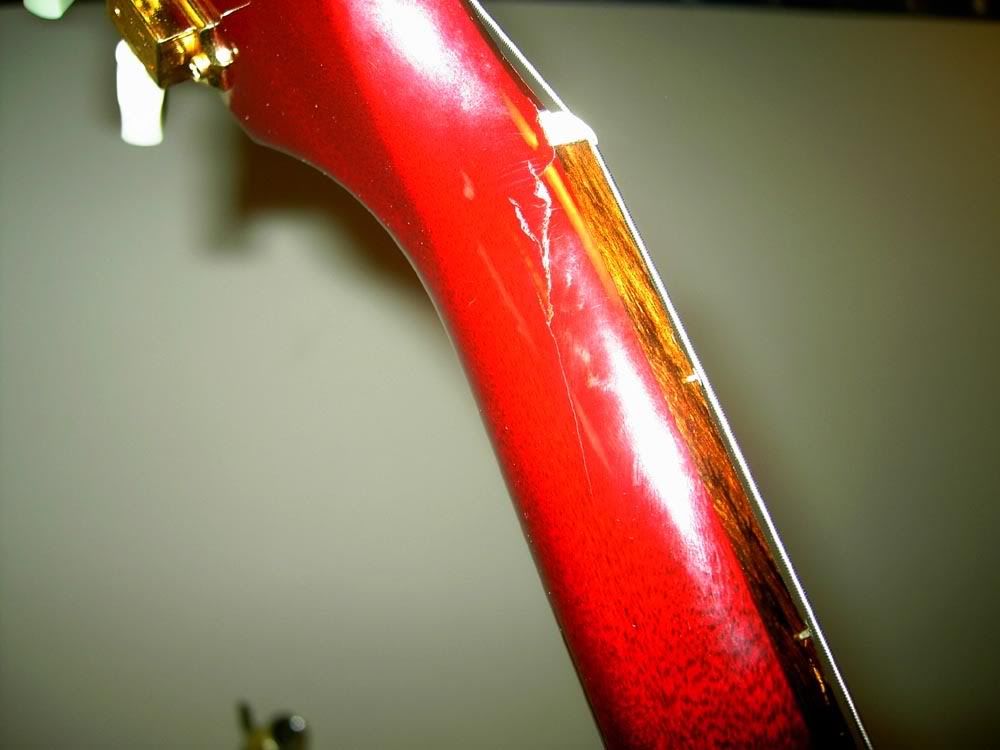
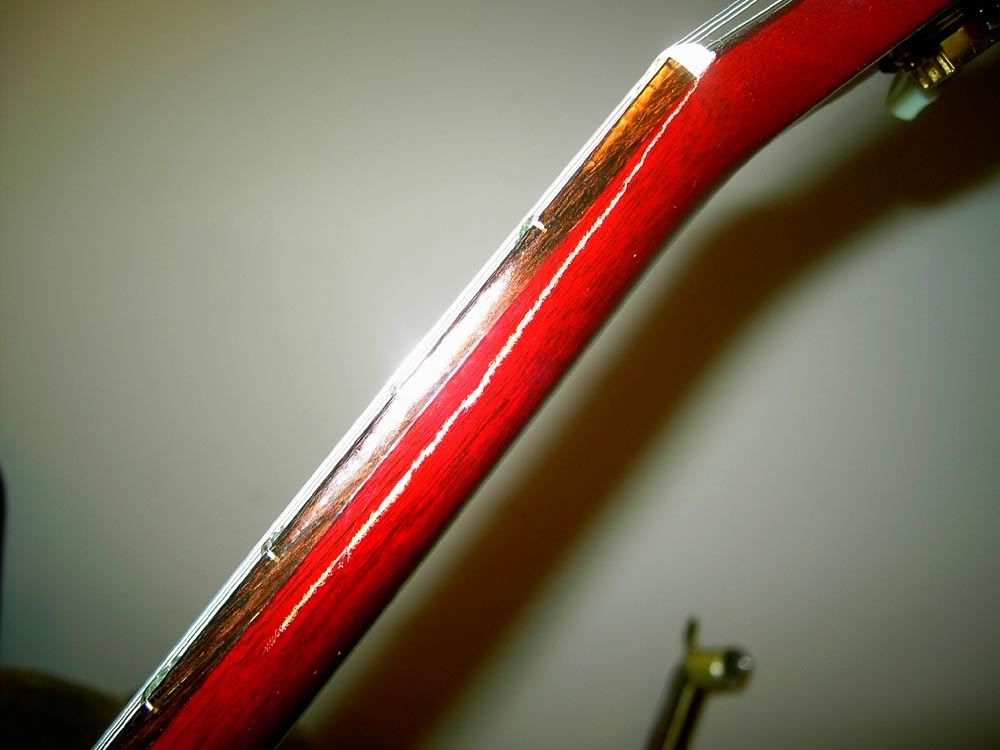
I suppose I'm lucky in that the grain of the neck caused a break that can be clamped back together in a fairly simple fashion -- IF I can spread it apart enough to get the glue in there. I ordered some syringes to help.
Moderators: VelvetGeorge, BUG


Really sorry to hear about that, Flames. I know exactly what you feel, cause I had a guitar that I was in the middle of building, and had just clamped up with about 15 heavy wood clamps on it, flip off the table while I was cleaning up the shop, and smash to pieces, WAY past the point of being repaired. I literally had to leave the house for a few hours, cause I was afraid I was gonna break something in frustration. You'll get that LP fixed. Just wait till you calm down before you work on it.Flames1950 wrote:Man am I pissed, I just lost my grip on my '96 LP Studio and watched the neck smack the floor.......you all know what that means on a Gibson.
I suppose I'm lucky in that the grain of the neck caused a break that can be clamped back together in a fairly simple fashion -- IF I can spread it apart enough to get the glue in there. I ordered some syringes to help.
Im not sure you can spread that open without enlarging the crack to SOME degree. (Remember, its splitting along grain lines, which have been weakened) I think the key is to get it open just enough to be able to get glue in there, and then load the s**t out of it. You can always wipe extra away, but you're really only gonna get 1 chance to do this the right way. I would firmly clamp the whole axe to a table, supporting the neck up to the point where the crack stops, and rig up a clamp between the headstock, and the table bottom so when you CAREFULLY tighten the clamp, the crack starts to open. (BTW, dont forget to completely loosen the truss rod) You might put a TIGHT, single wrap of masking tape, slightly overlapping the furthest end of the crack, which will start to split open if the crack starts to enlarge when you start opening it, or if you open it too far. Kind of a poor mans warning system. Matching the "lacquer" (on studio models, I dont think its lacquer at all--its most likely some sort of urethane, or acrylic) is gonna be tough if you really want the repair to be invisible. Hate to say it, but truly coming close to invisible would probably require a refin of the neck. Overspray, or partial refin, or spot refin will always be visible to some degree. Just a matter of how much work you're willing to do, and what result you wanna live with. Good luck, bro.Flames1950 wrote:Syringes are the only ticket for the glue.....the bigger issue is figuring out how to set up clamps to very slowly spread that crack open, without enlarging it!!!!
Then I have to match the lacquer....joy.
That's kinda what I meant, it just has to open enough to get the syringe in there, and depending on the glue's working time I may squirt it in and then find a way to raise the axe so that the glue seeps further down into the cracks towards the body. I may have to clamp to a separate board so I can raise it. Excess won't matter by the time I sand the areas down for refinishing anyway!!fillmore nyc wrote:Im not sure you can spread that open without enlarging the crack to SOME degree. (Remember, its splitting along grain lines, which have been weakened) I think the key is to get it open just enough to be able to get glue in there, and then load the s**t out of it.
What are you thinking of using for glue, Flames? I always am trying new things when it comes to repairs of this type, and like to hear different ideas from other repairmen. I hear of some guys trying CA glue (some version of crazy glue) but I've never tried that myself. Just doesnt seem like what I would wanna use on a repair of this type, but that doesnt mean it couldnt work. I would be a little nervous about the lack of usable working time with something like that, and I would also be concerned about it getting on the truss rod, and fusing it to the neck wood.Flames1950 wrote:That's kinda what I meant, it just has to open enough to get the syringe in there, and depending on the glue's working time I may squirt it in and then find a way to raise the axe so that the glue seeps further down into the cracks towards the body. I may have to clamp to a separate board so I can raise it. Excess won't matter by the time I sand the areas down for refinishing anyway!!fillmore nyc wrote:Im not sure you can spread that open without enlarging the crack to SOME degree. (Remember, its splitting along grain lines, which have been weakened) I think the key is to get it open just enough to be able to get glue in there, and then load the s**t out of it.

Well, this certainly seems to answer the full question, Flames. Glue type, and the repair is almost identical to yours. I figured as much about the CA glue, and I also would be concerned about the viscosity of yellow glue, though it is usually my glue of choice, just not for this repair. Its a "gitnip"... "good in theory, not in practice"!!! Good luck, and post some pics after you're done!!planetjimi wrote:Here is the link flames, hope this helps!
http://www.stewmac.com/tradesecrets/ts0 ... clk=125750
